Teaching Fundamentals
Teaching Fundamentals
Having good materials and lesson plans is one thing, but, like most things, if your fundamentals are lacking, so will your overall game. Here are some CORE principles of teaching (in general as well as languages in particular):
Giving Instructions:
- Anchoring: When you give instructions, you want to station yourself in a centralized location so that all students can see you i.e. not while you are handing something out or directed at just a section of the students in the classroom.

- Light-housing/Chesting: After you anchor, you want to display whatever handout or page in the textbook you are going to go over, put it near your chest, and use it as a visual reference to point things out (i.e. basically do a “Vanna White” for those who remember the famous game show of The Price is Right). Visual reference really facilitates instructions generally speaking, but even more so for English language learners who are trying to comprehend instructions in English.

- Clear & Concise Instructions: Use a clear voice with a volume level that all can hear – without being overly abrasive. Concise instructions include:
- Using short direct sentences i.e. using the command form “Write notes” instead of indirect speech used to be polite (so NOT the underlined: “Could you please write down some notes”, “If you could write down just a few notes” etc.)
- Go step-by-step: Focus on what they are going to do at the moment first and don’t make your instructions overly complicated by explaining what is going to go on later in the activity or later on in the lesson e.g. tell the students answer the questions 1-4 of an activity, and then after they answer, tell them to turn to a partner and discuss them. So, say: “Answer questions 1-4” (after students answer individually), then “Check your answers with a partner.” Rather than: “Answer questions 1-4, and after finishing, turn to a partner and discuss each individual question. Ok, go ahead.” Give instructions step-by-step.
- Instruction Comprehension Questions (ICQs): After giving instructions, you can follow up with a specific question to ensure that students understood. You want to check the students’ understanding primarily for difficult to understand activities and to ensure that the aims of the lesson will be met. A good way to formulate good ICQs is to:
- 1) Do the activity yourself first, and if there are things that are difficult to comprehend, think of ICQs to facilitate understanding of the activity.
- 2) Think about the stage aims for the activity and make questions ensuring that you meet those aims. For example, if you want students to practice speaking for fluency, you could ask them: “Are you going to just answer each other with one word answers like ‘yes or no’? Or, are you going to have a full conversation giving detail?” A: A full conversation with detail. “Are you just going to ask one question or can you also ask a follow-up question like ‘Why?’ A: Ask follow up questions, too.
What you DO NOT want to do, though:
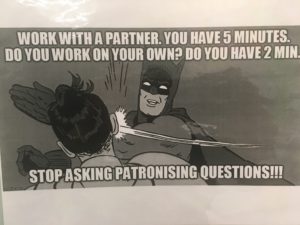
Ask patronizing questions! Try to make your ICQs meaningful and not use them unnecessarily.
- Demonstrations (Demos): Give a demo of the activity that you want the students to do; a good demo speaks a 1000 words! Demos are especially important for more complicated freer & productive activities. You can use the whiteboard in tandem with a lot of demonstrations (doing ‘number 1’ first as a class on the whiteboard).
- The Golden Rule: Generally, NEVER hand out anything before giving instructions – or Jules from Pulp Fiction might take issue with that.

Giving instructions after handing out activity sheets usually winds up with learners looking down at their sheet rather than at you and then maybe only some (or none) of your students are actually listening to your oral instructions.
Note: Sometimes you can give a demo and/or ICQs after handing out something depending on the activity. For example, sometimes doing a demo will require the students to have a copy of the handout in front of them. Though, to avoid giving instructions after something has been handed out, you can do a demo example on the whiteboard prior as has been noted previously.
- Speaking of, it’s a good idea to use the whiteboard sometimes to support instructions by either writing an example on the WB (as just discussed) or sometimes to illustrate group interaction patterns (e.g. in a speaking activity changing partners by having students rotate in a circular motion or perhaps in a line formation).
Language Clarification:
- Eliciting: This is where you draw out the answers from the students via questions rather than simply explaining or stating. Eliciting is used mostly to clarify language, for example, meaning of vocabulary words or rules of grammar points e.g. if you want to teach the word pizza:
- Explanation (what NOT to do): “A pizza is a kind of food that is a round piece of bread that has cheese and tomato sauce on it”
- Eliciting (what TO do): “What do we call that kind of food that is a round piece of bread that has cheese and tomato sauce on it? ” A: Pizza.
- Comprehension Check Questions (CCQs): Are questions used after eliciting that check comprehension and perhaps further deepen the students’ understanding of the language (e.g. vocabulary word definition or a grammar point). You can use the ‘CCQ Formula’ to help you design your questions: 1) make statements of meaning; 2) turn those statements into questions.
For example:
1st Statement: Pizza is made of three main components: cheese, tomato sauce, and bread.
1st CCQ: What three things is pizza made of? A: Cheese, tomato sauce, and bread.
2nd Statement: The bread of pizza is called the crust.
2nd Question: What is the bread of the pizza called? A: The crust.
Etc.
Why Questions rather than Explanation?:
Generally, questions engage whatever kind of student more in figuring out the answers themselves, and also, more particular to language learners, if you are teaching English as a foreign language to students learning English in English then it’s even more important to use questions rather than explanation to check to see if the students are following along with your explanation.
- Visuals: You can use visuals to help support your eliciting and your CCQs.

- Eliciting: You can first use the picture to ask the SS, “What do we call this?” A: Pizza.
- CCQing: Then you can use the picture to deepen comprehension further: “What’s a pizza made of? What do we call this (teacher points to cheese)? A: Cheese. How about this (teacher points to the bread)? A: Bread. What do we call the bread of a pizza? A: The crust. Etc.
Note: You need to elicit and CCQ for other language items other than just vocabulary i.e. also with grammar and functional language. For more info, click here.
Reading & Listening Comprehension Questions
- Ask Questions First: ALWAYS clearly ask comprehension questions before you have the students read or listen.
Feedback to Tasks
- Always give feedback to tasks: Do not let an activity end without giving feedback; not giving feedback on a task will cause the students to lose motivation to participate in the future and can lead to the students feeling confused and unsatisfied.
- Provide Visual Support: You always want to give feedback to tasks visually; visual support will serve as a clear reference, aid students who have a visual learning preference, and act as a clear signpost that one stage has ended so that you can transition to the next one smoothly. Also, remember, the students are learning English in English – it’s hard for them to follow along with all oral feedback without a clear visual reference.
Ways of giving visual support:
- Write on the Whiteboard: For activities that are not wordy and don’t take too much time to write (i.e. true/false, fill-in-the-gap, and matching activities etc.), write them on the board.
- Use Magnets and the Whiteboard: For more of an interactive experience, you can use magnets and slips of paper to give feedback. This type of feedback is good for activities that use visuals and phrases.
- Answer Keys: For really wordy activities that would take a long time to put on the whiteboard, provide the students with an answer key that they can use as a visual reference.
- Overhead Projector: Usually used in tandem with answer keys, is an overhead projector. You can use the overhead projector to go over the answer keys with the whole classroom.
- PowerPoint: You can pre-plan your feedback using a projector and PowerPoint slides.
- Smartboard/Smart TV: Can have ready made answer keys and broadcast them via a smartboard & TV. Can also simply take pictures of many things on your smart phones nowadays and send them to yourself via email/USB drive to broadcast on a smart TV, too.